
BrickStor SP Jumpstart Guide
Step 3: Configure Your System
Estimated time to complete: 30 minutes
Configure BrickStor SP
- SSH into the BrickStor using admin credentials. Run sudo setup command to reach the Main Menu.

2. Select option 2 to Configure nodename and click Enter.
-
- Enter the Management IP Address and click Enter.
- Enter the new Hostname of the BrickStor and click Enter.

3. Navigate back to the Main Menu and select option 5 Configure NTP settings.
-
- Select option 2 Configure NTP settings to configure the IP Address for NTP, system clock.

4. Navigate back to the Main Menu and select option 6 Configure DNS Settings.
-
- Select option 2 Configure DNS and /etc/resolv.conf. Follow the prompts to configure DNS.
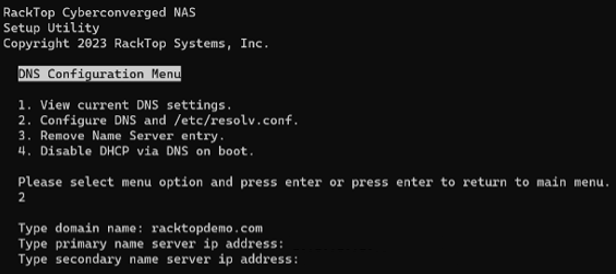
5. Navigate back to the Main Menu and select option 10 System Information and Administration.
-
- Select option 11 Add system to Active Directory. Follow the prompts to configure Active Directory.

6. Open a modern internet browser and enter https://IP_OF_YOUR_BRICKSTOR into the browser’s address bar.
-
- Log in with the username bsradmin and the password you created during installation.
- At the bottom of the page under Manage BrickStor SP section, select RackTop Hub Local.

7. Log in using the username bsradmin and password you created during installation.

8. In the main menu, navigate to the File Systems tab and select Create pool.

9. Shown below are the recommended settings, Drive Type may vary.

10. Navigate to the SMB Tab, select Create.

11. Name the new SMB share; the other settings can remain as the default. Click Next.
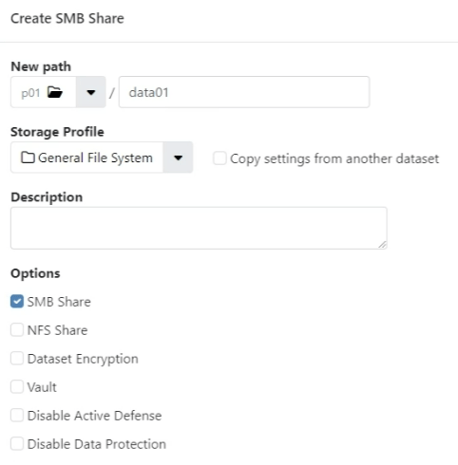
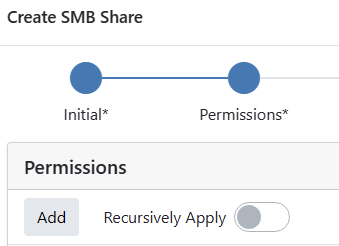
12. On the Permissions screen click add.
-
- Using the search box, search for a username or group to assign permissions. Once selected your choice is highlighted, select Next.

- Set Permissions to Read/Write. Once finished click Add.
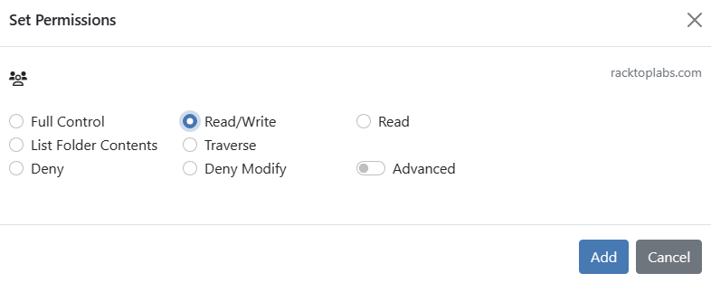
13. On the Permissions screen, select Skip to confirmation.
14. Review your selections and select Create SMB Share.
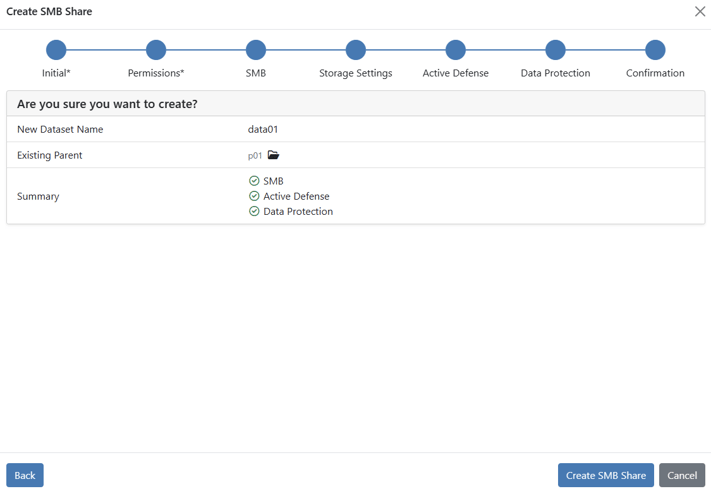
15. On the Data settings screen, scroll down to the SMB section.
-
- Note the SMB file path name.
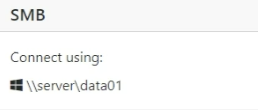
-
- Open Windows File Explorer and connect using the file path. You can now start adding data.

